Dynamic Systems: Animation, Attractors, and Image Processing in the Node Garden
In Part 1, we explored the foundational logic of the Node Garden: Instantiate and Connect. While this simple rule-set is powerful on its own, its true potential is unlocked when we move beyond static, random placement.
Part 1 Mastering the Node Garden: A Beginner’s Guide to Generative Networks
The beauty of such a concise algorithm lies in its versatility. By manipulating node distribution and connection criteria, you can transform a clinical geometric network into a complex, organic work of art. In this article, we will dive into advanced techniques: adding motion, utilizing structured grids, and even applying node-garden logic to image processing.
Bringing the Garden to Life: Animation
The most immediate way to evolve a node garden is through motion. By animating the nodes, the connections constantly break and re-form, creating a mesmerizing, ever-changing dance. Below is a p5.js example where nodes rotate around a center point.
/*
 * Node Garden application section
 * An animation of rotating nodes.
 */

const w = 640;
const h = 480;
const nodeNum = 12;
const frmRate = 24;
const baseR = Math.min(w, h);
const rangeS = baseR * 0.1;
const rangeL = baseR * 0.3;
const nodes = new Array();

function setup() {

	// canvas setting
	createCanvas(w, h);

	// animation setting
	frameRate(frmRate);

	// set the nodes
	for (let i = 0; i < nodeNum; i++) {
		let t = random(TWO_PI);
		let r = baseR * map(i, 0, nodeNum, 0.1, 0.5);
		nodes.push({
			x: r * cos(t),
			y: r * sin(t),
			r: r,
			t: t
		});
	}
}

function draw() {

	// let it move! Update node positions: Circular motion
	for (let i = 0; i < nodeNum; i++) {
		let n = nodes[i];
		n.t += PI * n.r * 0.0001;
		n.x = n.r * cos(n.t);
		n.y = n.r * sin(n.t);
	}

	// drawing setting
	translate(w * 0.5, h * 0.5);
	background(240);

	// draw lines
	noFill();
	stroke(0);
	strokeWeight(3);
	for (let i = 0; i < nodeNum - 1; i++) {
		let n = nodes[i];
		for (let j = i + 1; j < nodeNum; j++) {
			let m = nodes[j];
			let d = dist(n.x, n.y, m.x, m.y);
			if (d < rangeL && d > rangeS) {
				line(n.x, n.y, m.x, m.y);
			}
		}
	}

	// draw nodes
	fill(255);
	stroke(0);
	strokeWeight(2);
	for (let i = 0; i < nodeNum; i++) {
		let n = nodes[i];
		circle(n.x, n.y, 20);
	}
}
Adding "Tension" with Variable Stroke Weight
Even a simple rotation can be enhanced by making the aesthetics reactive. By modulating the strokeWeight based on the distance between nodes, you can introduce a sense of "viscosity" or physical tension to the network.
// Example: Line weight becomes thicker in the middle of the range
if (d < rangeL && d > rangeS) {
  let w = 3 * sin(map(d, rangeS, rangeL, 0, PI));
  strokeWeight(w);
  line(n.x, n.y, m.x, m.y);
}
When nodes are at the extreme ends of the connection range—either too close or too far—the lines taper off. This creates a rhythmic, viscous pulse that feels almost alive.
This is an example made in the same way. The code is written in Processing.
The node-garden animation nodes go back and forth on a straight line.
Beyond rotation, you can experiment with rectilinear motion, easing effects, or random walks. The movement of the nodes dictates the "mood" of the entire piece.
Geometric Precision: Grid-Based Distribution
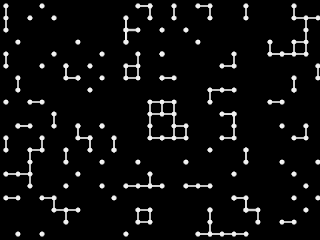
While randomness feels organic, structured placement—such as a grid—evokes a mechanical or "computational" aesthetic. By restricting nodes to a matrix and fine-tuning connection distances, you can create intricate, tile-like patterns.
Here is the example code of p5.js. This example demonstrates nodes constrained to a regular grid (or matrix).
/*
 * Node Garden application section
 * Set the nodes on the grid.
 */

const w = 640;
const h = 480;
const nodeNum = 200;
const nodes = new Array();

function setup() {
	createCanvas(w, h);
	noLoop();

	// set the nodes on the grid
	const step = min(w, h) * 0.05;
	for (let i = 0; i < nodeNum; i++) {
		nodes.push(createVector(
			floor(random(w / step)) * step,
			floor(random(h / step)) * step
		));
	}

	// draw node-garden
	background(0);
	push();
	translate(step * 0.5, step * 0.5);
	fill(240);
	stroke(240);
	strokeWeight(step * 0.1);
	for (let n of nodes) {
		for (let m of nodes) {
			let d = dist(n.x, n.y, m.x, m.y);
			if (d > step * 1.3 && d < step * 2.1) {
				line(n.x, n.y, m.x, m.y);
			}
		}
		circle(n.x, n.y, step * 0.3);
	}
	pop();

}
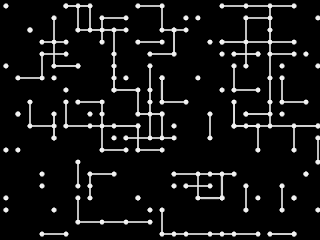
Varying the distance threshold (d) allows you to target specific neighbors: only horizontal/vertical ones, only diagonals, or even skipping immediate neighbors to create "leap-frog" patterns.
if (d > step * 0.9 && d < step * 1.1) {
if (d > step * 1.3 && d < step * 1.5) {
if (d > step * 1.9 && d < step * 2.1) {
if (d > step * 1.3 && d < step * 2.1) {
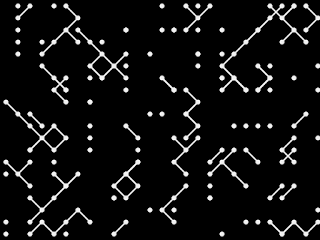
In the same way, you can make a picture like this. It uses erase() function and the two size node-gardens.
Pushing the Boundaries: Attractors and DLA
The tracks left by mathematical systems can serve as the "seeds" for your nodes. Two fascinating methods are Strange Attractors and Diffusion-Limited Aggregation (DLA).
Mathematical Chaos: Strange Attractors
Using a De Jong Attractor to determine node coordinates results in an eerily organic, almost visceral appearance. What was once a simple network becomes a surreal tangle of mathematical energy.
Explore "Flesh and Bone": A De Jong Attractor Study
Organic Growth: Diffusion-Limited Aggregation
DLA simulates the way corals or crystals grow. By placing nodes at the coordinates of aggregated particles, you can "garden" a digital coral reef. Even a simplified "Poor Man's DLA" algorithm can produce stunning results.
Read more about the "Poor Man's DLA" algorithm
Improve the Conditions of Drawing Lines
Animation with Node Gardens
Let's change the condition to draw the line with the angle between nodes, not the distance.
This example animation draws a line between vertical and horizontal angle nodes. The code written in Processing.
How I made this creative coding animation of a strange kind of node garden.
Image Processing with Node Gardens
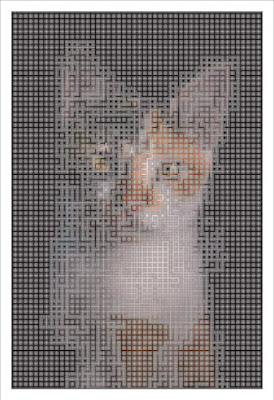
Finally, we can apply this logic to existing imagery. By placing nodes on a grid and sampling the underlying image's attributes (like color or brightness), we can draw connections only between nodes that share similar properties.
This transforms a photograph into a stylized, threaded tapestry, where the connections are governed by both proximity and visual harmony.
I'll show you Processing example code in the last part of this article.
Conclusion: Limitless Expression
The Node Garden is a testament to the fact that in creative coding, even the most basic techniques can lead to limitless expression. Whether you are simulating chaos with attractors or reinterpreting light through a grid, the only real boundary is your imagination.
In creative coding, while our technical tools may have boundaries, our visual expression is truly limitless.
I hope these examples inspire you to experiment with your own networks. If you create something, I’d love to see it—reach out via Twitter and share your garden!
Bonus: Processing Source Code (Image Manipulation)
For those interested in the technical implementation of the image manipulation shown above, you can find the full Processing (Java) code below. Feel free to adapt it under the GPL license.
/**
 * Purrid.
 * image manipulation of the node garden on the grid.
 *
 * @author @deconbatch
 * @version 0.1
 * @license GPL Version 3 http://www.gnu.org/licenses/
 * Processing 3.5.3
 * 2021.10.17
 */

void setup() {
  size(1080, 1080);
  colorMode(HSB, 360.0, 100.0, 100.0, 100.0);
  smooth();
  noLoop();
}


void draw() {

  int gridDiv    = 70;
  int caseWidth  = 30;
  int baseCanvas = width - caseWidth * 2;

  PImage img = loadImage("your_photo.jpg");
  float rateSize = baseCanvas * 1.0 / max(img.width, img.height);
  img.resize(floor(img.width * rateSize), floor(img.height * rateSize));
  println(int(img.width));
  println(int(img.height));

  // nodes on the grid
  int gridStep    = floor(max(img.width, img.height) / gridDiv);
  ArrayList<Node> nodes = getGridNodes(img, gridStep);

  translate((width - img.width) / 2, (height - img.height) / 2);

  drawBackground(img, gridStep);
  drawLines(nodes, gridStep, 0.0, 3.0);
  casing(caseWidth, img.width, img.height);
  saveFrame("frames/pd0001.png");

  drawBackground(img, gridStep);
  drawLines(nodes, gridStep, 0.5, 2.0);
  casing(caseWidth, img.width, img.height);
  saveFrame("frames/pd0002.png");

  drawBackground(img, gridStep);
  drawLines(nodes, gridStep, 1.5, 0.5);
  casing(caseWidth, img.width, img.height);
  saveFrame("frames/pd0003.png");

  exit();

}


/**
 * getGridNodes : returns node on the grid as Node array
 */
public ArrayList<Node> getGridNodes(PImage _img, int _step) {

  ArrayList<Node> nodes = new ArrayList<Node>();
  _img.loadPixels();

  // centering the grid
  int iXMax = ceil(_img.width * 1.0 / _step);
  int iYMax = ceil(_img.height * 1.0 / _step);
  int rXDiv = floor((_img.width - iXMax * _step + _step) * 0.5);
  int rYDiv = floor((_img.height - iYMax * _step + _step) * 0.5);
  for (int iX = 0; iX < iXMax; iX++) {
    for (int iY = 0; iY < iYMax; iY++) {
      int rX = iX * _step + rXDiv;
      int rY = iY * _step + rYDiv;
      if (rX < _img.width && rY < _img.height) {
        int pixIndex = floor(rY * _img.width + rX);
        nodes.add(new Node(
                           rX,
                           rY,
                           hue(_img.pixels[pixIndex]),
                           saturation(_img.pixels[pixIndex]),
                           brightness(_img.pixels[pixIndex])
                           ));
      }
    }
  }

  return nodes;

}


/**
 * drawBackground : draw mesh background
 */
private void drawBackground(PImage _img, int _step) {

  _img.loadPixels();

  rectMode(CENTER);
  stroke(0.0, 0.0, 90.0, 100.0);
  strokeWeight(0.5);
  background(0.0, 0.0, 0.0, 100.0);

  // centering the mesh
  int iXMax = ceil(_img.width * 1.0 / _step);
  int iYMax = ceil(_img.height * 1.0 / _step);
  int rXDiv = floor((_img.width - iXMax * _step + _step) * 0.5);
  int rYDiv = floor((_img.height - iYMax * _step + _step) * 0.5);
  for (int iX = 0; iX < iXMax; iX++) {
    for (int iY = 0; iY < iYMax; iY++) {
      int rX = iX * _step + rXDiv;
      int rY = iY * _step + rYDiv;
      if (rX < _img.width && rY < _img.height) {
        int pixIndex = floor(rY * _img.width + rX);
        fill(
             hue(_img.pixels[pixIndex]),
             min(5.0, saturation(_img.pixels[pixIndex])),
             map(brightness(_img.pixels[pixIndex]), 0.0, 100.0, 40.0, 70.0),
             100.0
             );
      } else {
        fill(0.0, 0.0, 60.0, 100.0);
      }
      rect(rX, rY, _step, _step);
    }
  }
}


/**
 * drawLines : draw lines between nodes that have the same color and have some distance.
 */
public void drawLines(ArrayList<Node> _nodes, int _step, float _distBase, float _weight) {

  float rangeShort = _step * (_distBase + 0.6);
  float rangeLong  = _step * (_distBase + 1.3);

  for (Node nFrom : _nodes) {
    boolean alone = true;
    noFill();
    for (Node nTo : _nodes) {
      float divDist = dist(nFrom.x, nFrom.y, nTo.x, nTo.y);
      float divHue  = abs(nFrom.hueVal - nTo.hueVal);
      if (
          divDist > rangeShort && divDist < rangeLong  // within range
          && (divHue > 355.0 || divHue < 5.0)          // nealy same color(hue)
          ) {
        strokeWeight(map(divDist, rangeShort, rangeLong, 2.0, 0.1) * _weight);
        strokeCap(ROUND);
        stroke(
               nFrom.hueVal,
               nFrom.satVal,
               nFrom.briVal,
               100.0
               );
        line(
             nFrom.x,
             nFrom.y,
             nTo.x,
             nTo.y
             );
        alone = false;
      }
    }
    if (alone) {
      noStroke();
      fill(
           nFrom.hueVal,
           nFrom.satVal,
           nFrom.briVal,
           100.0
           );
      ellipse(
              nFrom.x,
              nFrom.y,
              _weight * 2.0,
              _weight * 2.0
              );
    }
  }
}


/**
 * casing : draw fancy casing
 */
private void casing(int _casing, float _w, float _h) {
  rectMode(CORNER);
  fill(0.0, 0.0, 0.0, 0.0);
  strokeWeight(_casing + 4.0);
  stroke(0.0, 0.0, 30.0, 100.0);
  rect(-_casing * 0.5, -_casing * 0.5, _w + _casing, _h + _casing, 10.0);
  strokeWeight(_casing);
  stroke(0.0, 0.0, 100.0, 100.0);
  rect(-_casing * 0.5, -_casing * 0.5, _w + _casing, _h + _casing, 10.0);
}


/**
 * Node : draw and hold location and color.
 */
public class Node {

  public  int   x, y;   // coordinate of node
  private float hueVal; // hue value of node
  private float satVal; // saturation value of node
  private float briVal; // brightness value of node

  Node(int _x, int _y, float _c, float _s, float _b) {
    x = _x;
    y = _y;
    hueVal = _c;
    satVal = _s;
    briVal = _b;
  }

}

/*
Copyright (C) 2021- deconbatch

This program is free software: you can redistribute it and/or modify
it under the terms of the GNU General Public License as published by
the Free Software Foundation; either version 3 of the License, or
(at your option) any later version.

This program is distributed in the hope that it will be useful,
but WITHOUT ANY WARRANTY; without even the implied warranty of
MERCHANTABILITY or FITNESS FOR A PARTICULAR PURPOSE.  See the
GNU General Public License for more details.

You should have received a copy of the GNU General Public License
along with this program.  If not, see <http://www.gnu.org/licenses/>
*/


